Three Simple Steps To A Spotless Sidewalk

Keeping your sidewalks clean throughout the year isn't always an easy feat. Nature and the elements are always doing their best to claim your walkways for themselves, barraging them with an onslaught of dirt, grime, and slime!
As with any other exterior area of your property, the occasional cleanup is necessary to keep your sidewalks clean and safe. However, a little preventative maintenance can make sidewalk mess a little easier to manage in the future. Here's the trick to locking in a fresh, clean, sidewalk while locking out stains and weeds.
1. Start With Pressure Washing
Before you can do anything else, you need a blank, clean surface, so start with sidewalk cleaning. We'll be using sealants here in a bit, and you don't want to seal in a bunch of dirt and mess.
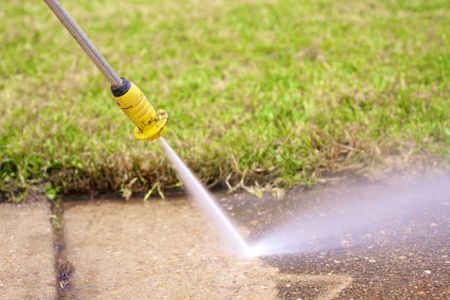
When you need a sidewalk cleaning done fast and done right, nothing beats pressure washing. You need more than just a simple sweep of the surface- you need to get out all of the stains and dirt that are trapped in the surface's pores. You or your pressure washing expert should also use a mild detergent to kill algae and mold spores, to make sure the old mess doesn't come back to haunt your walkways!
This part is also crucial: make sure that any cracks and the joints between the slabs are fully cleaned of dirt, weeds, and moss. Some people choose to do this by hand, but a pressure washer can be used to blast them out. Killing the weeds beforehand with a weed killer or boiling water can make the job easier, too.
Pick a time when you have a few warm, sunny days in the forecast. Once you've thoroughly completed your sidewalk cleaning, you want to give the surface at least 24 hours to completely dry. Once that's done, move on to the next step.
2. Fill In All Cracks And Joints
Before we can add sealant, we should repair any cracks, as well as fill in the joints where the concrete slabs connect. Not only will this help the sealant set properly, but it'll reduce the issue of weeds and moss popping up on your sidewalks. Since we cleaned these spots in the previous step, we can move right on to filling them.
For cracks in your sidewalk, we recommend using either patching concrete for a firm, solid seal. For the joints, you want something flexible, as concrete can grow and shrink slightly in changing temps- we recommend a polyurethane sealant or masonry caulk. Follow the manufacturer's instructions to repair the cracks and fill the joints. Once they've had time to fully set, we can move to the final step.
3. Seal The Concrete
It's much easier to prevent heavy or permanent stains if your sidewalk has been properly sealed. This step does not need to be done yearly, so if your sidewalk has been sealed semi-recently, you can skip this step. However, sealant starts to wear away after 2 or 3 years, so if it's been about that amount of time or longer since it was last sealed, it may be time for a touch-up.
What sealant you use may depend on personal preference, as some people like to cultivate a certain look for their sidewalks choosing sealants that imbue a matte or glossy look. If you're particularly, talk to an expert at your local home improvement store to choose an option that suits you best. However, in most cases, you can't go wrong with a plain old epoxy sealant. Just like the previous steps, apply your sealant according to the manufacturer's instructions, when you have a couple of hot sunny days for the sealant to fully set.
And you're done! Now your sidewalk will be better able to thwart mess, and it'll be easier to clean up too when the time comes. Naturally, if you need any help with sidewalk cleaning, driveway washing, and other concrete clean-up jobs, KNB Exteriors is proud to be of service. Call and let us know what you need today at 410-565-2580.

Contact Knb Exteriors Today For Quality Pressure Washing In Annapolis!